So, you’ve finished writing your blog post.
Bravo!
You’ve made it.
Now, all that’s left to do is to paste your content into WordPress and click publish.
Right?
Not so fast.
The truth is, writing your blog post is only 50% of creating knockout content.
The other 50%?
It’s in the editing.
And here’s what’s scary: editing doesn’t mean skimming your post to find that tricky misspelled word or grammar error (I mean, you have Grammarly for that, right?).
Rather, it means:
- Diving deep into your post to see if it’s the best it can be
- Optimizing your post for SEO (making sure you leave nothing out)
- Cutting down redundant words, sentences, and even paragraphs
- And much more
Don’t worry, though.
In this blog, we’ll cover everything you need to know about how to edit a blog post.
Plus, I’ll throw in an editing checklist you can use each time you sit down to…well, edit.
So, are you ready?
Let’s go!
How to Edit a Blog Post: 6 Steps to a Perfectly Polished Post that’ll Wow Readers
The truth is, there are no shortcuts to editing a blog post.
To get quality, polished content, you need to sit down and do the work.
But don’t worry.
There is a simple process you can follow step-by-step.
Once you’ve mastered it, editing your blog posts will become second nature to you.
Let’s look at each one of these steps.
Step #1: Optimize Your Headings and Subheadings (For Humans AND for Robots)
Your headings and subheadings are like signposts in the map of your blog.
They help people visualize where you’re going with your content.
Also, if they’re good enough, they compel readers to keep reading (even though they’re dying to check out cute Instagram stories or to update their status on Facebook).
But headings and subheadings aren’t only good for readers…but also for the robots.
Google loves well-optimized headers with the right keywords in the right place.
So…let’s get into optimizing those headers and subheaders.
First, give them a careful scan.
Ask yourself:
- Do they avoid giving too much away?
- Are they surprising or interesting?
- Are they clear (do they give readers a good idea of what I’ll cover in the next section)?
- Do they make people want to read what I’ve written under them?
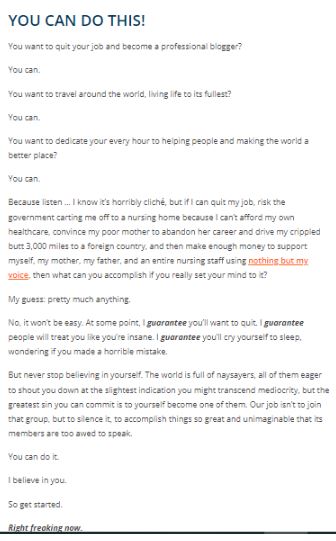
Here’s an example of a subheading that ticks all of the “good subheading” boxes:
 Source: smartblogger.com
And here’s one that gives too much away (making readers feel like they’ll learn nothing new from continuing to read).
 Source: designrr.io
After you’ve optimized for readers, it’s time to optimize for search engines.
Here’s what you want to find:
- The primary keyword in your heading (and in as many subheadings as possible)
- The primary keyword in your heading as close to the beginning as possible
- Secondary keywords in as many subheadings as possible
- Proper styles (H1, H2, H3)
Check out this example of a perfectly optimized heading:
 Source: enchantingmarketing.com
Ok…now that your headings and subheadings are perfect and polished, let’s move into:
Step #2: Cut Down Cruelly on Your Body
Ouch.
This sounds like it hurts.
And it does, especially if you fall in love with some fancy sentences you believe came from the Muse of Creativity herself.
But here’s the thing.
Your readers are itching to stop reading your blog.
Which means, the first excuse you give them, they’ll bail.
Which also means, you need to be as brief, concise, and power-packed as possible.
Say good-bye to wordiness, excess adjectives and adverbs, and pretty, literary prose.
For example.
Don’t write this:
“In order to succeed in the world of content marketing, it is important to ensure that you have the handy skills necessary to rise in this overly-saturated, cat-and-mouse environment.”
Write this instead:
“To succeed in content marketing, you need the right skills.”
See what happened there?
32 words became 10.
Trust me, your audience will prefer 10 words to 32.
So, go ahead.
Cut your blog down ruthlessly.
Get rid of:
- Paragraphs that don’t need to be there (because your meaning is clear without them)
- Adjectives
- Adverbs
- Useless phrases like “in order to” or “it is important”
- Long-winded stories and anything that distracts your audience from what you’re saying (stories are fine, but keep them super brief)
- Anything you can eliminate without robbing your post of its meaning
Post got shorter by 200 words? 500 words even?
Great.
You’re ready for the next step.
Which is:
Step #3: Prune Your Introduction and Conclusion
Maybe you think your introduction and conclusion are (somewhat useless) add ons to your blog.
They’re not.
They’re the two most essential parts of any blog.
Which means, you need to spend time pruning and shaping them to perfection.
Remember, both of them should:
- Be around 100-200 words long
- Contain the primary keyword at least once in the first 150 words
- Be compelling, urging readers into action (the introduction compels people to read the blog, the conclusion compels them to take the next step)
Check out this powerful introduction and compare it with yours while you edit:
 Source: smartblogger.com
Note:
- The primary keyword is in the first sentence of the introduction.
- The problem (writing a bio is hard) and the promise (you’ll learn an easy process for doing it) are front and center.
- The language is brief, flowing, and conversational.
- There are no tedious blocks of text.
- Readers will feel their mouths watering with desire to read the whole blog.
Now, check out this conclusion:
 Source: problogger.com
Note:
- The primary keyword is close to the beginning of the conclusion.
- The conclusion urges readers to take the next step.
- The conclusion leaves readers feeling positive and empowered.
Now, your turn.
How does your introduction and conclusion live up to these examples?
Step #4: Turn Your Blog into Eye Candy
You know it and I know it.
Wikipedia sucks.
That’s because we’re stuck with endless blocks of tiny text that make us dizzy.
Like this:
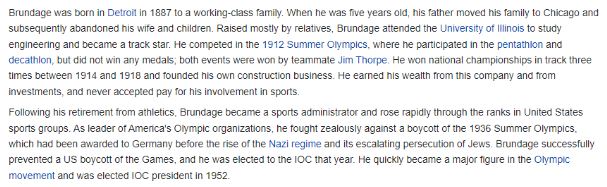 Source: wikipedia.org
Right.
You don’t want your reader to feel the way you feel when you plow through Wikipedia.
So don’t make them feel that.
Instead, make them happy with paragraphs that are easy on the eye. (A great rule of thumb is to keep paragraphs between 1-3 sentences long.)
Also, litter your blog with images.
These can be photos, screenshots, or even charts and graphs.
One image every 200-500 words is a good rule to stick to.
Because seriously.
Would you rather read the above Wikipedia page…
…or something like this?
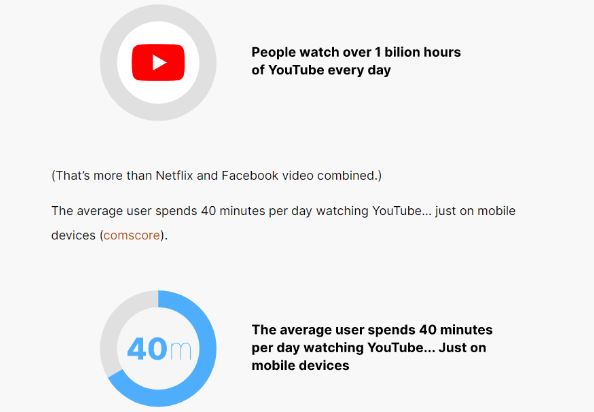 Source: backlinko.com
Step #5: Link, Link, Link
As an affiliate marketer, your affiliate links are essential to, well, everything.
But the truth is, you need more than just your affiliate links.
You need:
- External links. External links are links to other high-quality sites. They help Google find you and better understand what your website is about.
- Internal links. Internal links are links to other pages in your site. They help Google understand the structure of your website.
Before publishing any post, make sure you have links in at least every 500 words (200 is better).
Also, make sure your affiliate marketing links are working.
You wouldn’t want to miss a sale just because of a clumsy little mistake.
Step #6: Proofread Till You Drop
I said earlier that looking for grammar and spelling errors is the least of your worries when editing your post.
Or something like that.
But I didn’t mean you should skip this step altogether.
Nope!
Because the truth is, one grammar or spelling mistake will make a big difference in what your audience thinks of you.
Mistakes like these show you’re sloppy and lazy.
So before hitting the “publish” button, proofread your work till your eyes fall out.
Of course, you can make things easier with a premium tool like Grammarly.
 Source: grammarly.com
Still, don’t rely too much on robots.
Trust your savvy writer self the most when you’re scouring your work for that evil misspelled word or wrong verb tense.
How to Edit a Blog Post – A Checklist
When editing your blog post, ask yourself these questions. (And be brutally honest.)
- Are my headings and subheadings optimized for both readers and robots?
- Is my blog easy to read (no overly wordy paragraphs and tedious sentences)?
- Do I get the point clearly across?
- Will readers flow through the whole blog easily and comfortably from start to finish?
- Are my introduction and conclusion powerful enough to stir readers to action?
- Do I have images and links in every 200-500 words?
- Are my affiliate links all working well?
- Are there zero spelling and grammar mistakes in my post?
Said yes to all of these questions?
Your blog post is ready to hit the limelight!
How to Edit a Blog Post – The Simple, Step-by-Step Method
I’ll be honest with you.
Editing a blog post is hard.
And a LOT hinges on whether or not you do it well.
I mean, do you really want readers to bail on you because you got too long, dry, and boring?
Or ridicule you because you used “your” instead of “you’re”?
Or click the “back” button because your subheaders were too flat and revealing?
No. No. And No.
So before your blog posts see the light of day, you need to attack and destroy them until nothing is left except power and goodness.
Seriously.
It’s not that hard.
All you need is time and the easy, step-by-step process I mentioned above.
So go ahead.
Copy the checklist onto a Post-It and stick it to your computer.
Refer back to it every time you have a new post to publish.
In no time, you’ll notice an improvement in your content.
And more. And more.
Until your inbox is flooded with loving fans, telling you that you’re the best thing they’ve ever read.
Because really.
The goodies are in the details.
Image credits: All screenshots taken by the author, September 2022.

